Cisco Secure Access provides multiple pathways for users to access the internet and private resources securely. Among ...
Cisco Secure Access provides multiple pathways for users to access the internet and private resources securely. Among these offerings is VPNaaS. Unlike traditional VPN deployments where administrators must configure and manage VPN headends (the termination points for VPN tunnels), a VPNaaS handles this heavy lifting for you in the cloud. This makes setting up VPNs a remarkably straightforward process. The only significant configuration element that remains is authentication—determining how users will verify their identities when connecting.
When it comes to authentication for VPNaaS in Cisco Secure Access, you have three options:
- SAML: Integration with identity providers like Duo, Azure AD, etc
- Certificate-based authentication: Using digital certificates to verify user identities
- RADIUS: Leveraging your existing RADIUS infrastructure
Each option has its merits. For organizations that utilize Cisco's Identity Services Engine (ISE) as their RADIUS solution, it makes good sense to leverage ISE for AAA in Secure Access. This is because it allows you to maintain consistent access policies across your network and extend them seamlessly to your VPN users.
In this blog post, we'll walk through how to configure ISE as your AAA solution for Cisco Secure Access VPNaaS.
Configuration in Cisco Secure Access
Before diving into ISE configuration, we need to set up the VPNaaS environment in Cisco Secure Access.
Prerequisite 1: Configure RADIUS Server and Group
The first step is to add your ISE deployment as a RADIUS server and RADIUS server group in Cisco Secure Access:
- In Secure Access, navigate to Resources > Settings > AAA Servers.
- Click Add Group. Here you have the option to configure AAA parameters. For example, if you use a non-standard port for a AAA method, you can configure it here.


- Next, navigate to RADIUS Servers and click Add Server. Here is where you enter details for each ISE server, like IP address and password. You’ll also associate each RADIUS server with a RADIUS group.


Prerequisite 2: Configure IP Pools
IP pool configuration is next in the setup. IP pools determine the IP addresses assigned to both management functions and end users. For a basic RADIUS deployment, you'll need to configure at least two types of IP pools:
- System IP Pool: This serves as the IP address that Secure Access will use to communicate control plane traffic with your ISE deployment.
- User IP Pools: These pools provide addresses for your end users when they connect via VPN. You'll typically configure separate pools for each region where you offer VPN services. You can also configure separate pools for different use cases, e.g., one IP Pool for IoT devices, another IP Pool for Contractors, and another IP Pool for Employees, etc.
- Navigate to Connect > End User Connectivity > Virtual Private Network > Add IP Pool

- First, configure the System IP Pool. Select a Region, Display name, DNS server, and IPv4 range to use.

- Add user IP Pools.

- You can also associate a RADIUS group with this IP pool at this point. Doing so saves some configuration time when configuring a VPN profile below.

Configuring VPNaaS
With the prerequisites in place, you can now configure the VPNaaS service itself. Navigate to Connect > End User Connectivity > Virtual Private Network > Add VPN Profile.

The VPN Profile configuration flow has 4 steps: General Settings, AAA Configuration, Traffic Steering, and Cisco Secure Client configuration.
1. General Settings
Under General Settings, you'll configure basic parameters for your VPN service. This includes assigning the IP Pool configured earlier.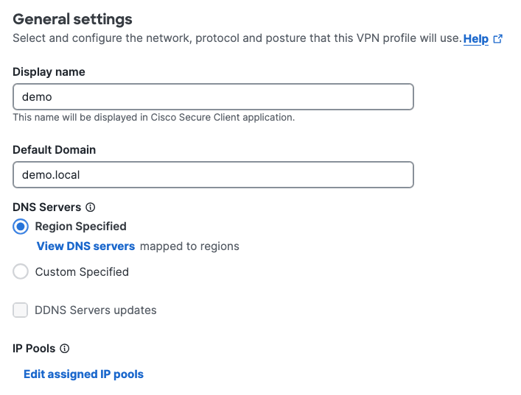
2. AAA Configuration
As discussed above, in Secure Access, you have three Authentication options or protocols.
- From the Protocols menu, select RADIUS.
- You will be asked to select which RADIUS group to map Authentication to. If you associated the IP Pool configured earlier with a RADIUS group, this will be auto-populated.

- Select the Authorization tab to configure Authorization settings.
- Enable RADIUS for Authorization. You will be asked to select which RADIUS group to map Authorization to. If you associated the IP Pool configured earlier with a RADIUS group, this will be auto-populated.

- Enable RADIUS for Accounting. You will be asked to select which RADIUS group to map Accounting to. If you associated the IP Pool configured earlier with a RADIUS group, this will be auto-populated.

3. Traffic Steering
This section allows you to configure how user traffic is handled once authenticated. In particular, you can determine what traffic, if any, should bypass the tunnel and what traffic should go through the tunnel. Configure traffic steering based on your organization's needs.
4. Cisco Secure Client Configuration
The final step involves configuring the client-side settings. Configure this based on your organization's needs.
Configuration in ISE
With Secure Access configured, we now need to set up ISE to recognize and properly handle authentication requests from the VPNaaS service.
Adding Secure Access as a Network Device
This step is recommended because you can then reference the Network Device Name in policy conditions, posture conditions, etc.
- Navigate to Administration > Network Resources > Network Devices
- Click Add and enter a name for your Secure Access deployment
- For the IP address, use the System IP pool address you configured in Secure Access

- Under RADIUS Authentication Settings, enter the same shared secret you configured in Secure Access
Configuring Policy
Now you need to create or modify policies in ISE to handle the authentication requests from Secure Access. There's considerable latitude in how you configure these policies based on your organization's needs. Below I give a simple example of creating a new Policy Set for Secure Access VPNaaS.
- Create a dedicated policy set for VPN authentication:
- Go to Policy > Policy Sets
- Add a new policy set with a condition that matches the network device name you just created

- Configure authentication policy:
- Determine which identity sources to use (Internal users, Active Directory, LDAP, etc.)
- Set conditions for different authentication methods
- Configure authorization policy:
- Define what access rights users receive upon successful authentication
Conclusion
Integrating ISE with Secure Access VPNaaS represents an ideal balance between cloud-based simplicity and on-premises policy control. By offloading VPN infrastructure management to Cisco's cloud while retaining authentication control within your existing ISE deployment, you get the best of both worlds: streamlined operations with consistent security policies.
Please feel free to reach out if you have any questions or comments.